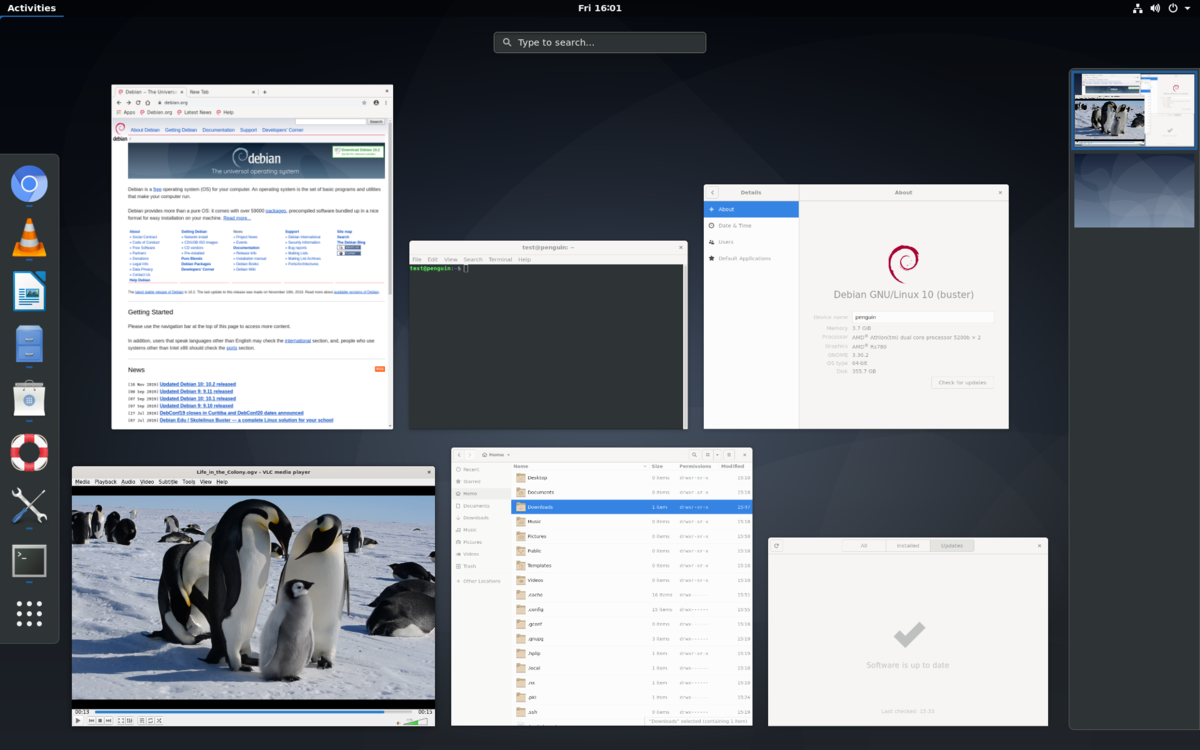
Retro Linux Distros and Gaming

  • Hallo! I searched this forum and many cracks of the Internet but could not find a good answer for my questions. (if there is something out there on YouTube or another forum please just point me in the right direction) :mauer::steinigung:

    I'm looking for the "best" and/or easiest Linux distribution to use for some old school gaming. (Quake 3 Arena, Unreal Tournament, Half-Life or anything like that) If I can JUST get Q3A working I'll be happy.

    System is a 1.4Ghz Pentium 3, 1GB PC133 RAM, Geforce4 Ti 4200, SoundBlaster Live!, and a 10/100 NIC) I do have Voodoo4/5 to try later but I think it would be best to get things running on the Geforce4 first.

    From what I read the Linux nVIDIA 96.43.23 driver only supports X.Org xserver versions 1.11 and 1.12 so that does limit distros/versions that can be used.

    • Anyone have any luck with a specific Linux distro/version and these nVIDIA drivers?
    • Any chance there is a tutorial or simple steps that need to roughly be followed? (I am not great with all the Linux things but can figure most things out if shoved in the right direction)
      • The steps can be high level: install this, do this, type this command, create this directory, copy this file here, chmod 777 this file, etc.
      • I have original Quake 3 PC and Linux discs and have already downloaded linuxq3apoint-1.32b-3.x86.run (I could also try ioquake3 if that might be better)

    Any help would be greatly appreciated! I'm just looking to try something new and challenging. (and maybe others will too!)

    I saw a picture recently that rekindled my curiosity :bonk:

  • I wouldn't go for the 96.43.23 Driver. Because it is from 2012. Your card is from around 2002

    Maybe i would even focus on the V4 first.

    From what i know, old Redhat versions comes with the 3dfx drivers. You might want to get an old Debian / SUSE distros. I think Debian might be easier with the package management (after modding a little you should be able to use APT + Package mirror)

    Red Hat Linux - Wikipedia
    en.wikipedia.org

    Index of /debian-archive/debian/dists

    There are this big Paper Boxes out there with 5-7 CDs and a big book. Maybe you finde there the right version.

  • I have ran Quake III Arena successfully on CentOS 6.x Linux and FreeBSD 10.x (which is a UNIX-like operating system spawned from the original Berkeley Software Distribution). Quake III Arena - and Daikatana, as a fun fact - still work on FreeBSD 12 on the same system.

    In the CentOS 6.x Linux case, I used both an old GeForce (sorry I don't remember which model) using closed-sorce NVIDIA drivers and a Radeon R7 250 with the official closed-source AMD driver, as the kernel was too old to support the open-source one. In the FreeBSD case, I used an Intel GMA 950 iGPU.

    If you wish it, I can re-test this on RedHat Enterprise Linux 8.6 (which is binary-compatible with corresponding Rocky Linux and Alma Linux versions).

    1-6000-banner-88x31-jpg

    Stolzer Besitzer eines 3dfx Voodoo5 6000 AGP Prototypen:

    • 3dfx Voodoo5 6000 AGP HiNT Rev.A-3700

    [//wp.xin.at] - No RISC, no fun!

    QotY: Girls Love, BEST Love; 2018 - Lo and behold, for it is the third Coming; The third great Year of Yuri, citric as it may be! Edit: 2019 wasn't too bad either... Edit: 2020... holy crap, we're on a roll here~♡!

    Quote Bier.jpg@IRC 2020: "Je schlimmer der Fetisch, desto besser!"

  • Hello and thank you for the responses/recommendations!

    I'll continue to look at other distributions to see what might be good options.

    I was able to get everything working with Debian 7.11.0 "Wheezy". It took quite a bit of trial and error but I was able to successfully install the nVIDIA drivers and Quake III Arena runs like a dream!

    I did get audio working but it's kind of funky. After booting up desktop audio is fine and works, but I have to run sudo modprobe snd-pcm-oss before launching Q3A to get game audio. I'll Google that some more and see if I can figure out what's going on. There are a lot of new terms for me to learn about with Linux audio. alsa, pulse audio, etc.

    I'll try to document the steps taken in case others want to try and get a Linux box running. Next up is trying some 3dfx Linux (even if the drivers aren't that great it will be a fun experiment with a Voodoo4)

    Cheers!

  • OSS is the Open Sound System and one of the oldest, simplest and most reliable sound systems in existance on UNIX-like operating systems. I also use it on FreeBSD. PCM is pulse-code-modulation, essentially the lossless codec used by WAV files. You can auto-load that module (essentially a kernel driver) at boot, but I don't know for sure how to do that on Debian 7 (I'm more of a RedHat person). [Look here] for more info on that. I'm assuming you're using the modern default, which is systemd, as ugly as it may be, so go down that route.

    Sadly, the audio subsystems of Linux are overly and in my personal opinion often unnecessarily complicated. :(

    1-6000-banner-88x31-jpg

    Stolzer Besitzer eines 3dfx Voodoo5 6000 AGP Prototypen:

    • 3dfx Voodoo5 6000 AGP HiNT Rev.A-3700

    [//wp.xin.at] - No RISC, no fun!

    QotY: Girls Love, BEST Love; 2018 - Lo and behold, for it is the third Coming; The third great Year of Yuri, citric as it may be! Edit: 2019 wasn't too bad either... Edit: 2020... holy crap, we're on a roll here~♡!

    Quote Bier.jpg@IRC 2020: "Je schlimmer der Fetisch, desto besser!"

  • Thank you for the infos! Module was auto-loaded simply as you said by adding a "snd_pcm_oss" line to "/etc/modules". I just used VI slipped it in there and it worked perfect. (step 11 below)

    Soooo I documented the steps I took, mostly for future reference on a rainy day when I want to spin up a functional Linux box. The procedures aren't the best or optimized or likely ideal, but the instructions worked for me twice. (first documented steps, then followed those steps word for word with success a couple times) There are probably typos and/or incorrect information but it's something to roughly follow. Sharing is caring! :D Let's see if this window has a text limit.

    - Computers Specs -

    Motherboard: FIC FA15T socket 370

    CPU: 1.4Ghz Tualatin Pentium 3 | 133Mhz FSB

    RAM: 1.5GB (3x512MB) PC133 Micron SDRAM

    GPU: ABIT Geforce4 Ti 4200

    Soundcard: Creative Sound Blaster Audigy 2 ZS Live! SB0060

    NIC: Dynex DX-E102 10/100

    - Linux Distribution -

    Debian 7.11.0 "Wheezy"

    Linux 3.2.0-4

    GNOME Desktop Environment Version 3.4.2

    X.Org X Server 1.12.4

    Important things to note!

    • Ran all commands as root unless otherwise specified. So if the computer reboots at any point in these steps re-open the terminal and use the su command to switch user to root.

    • This guide DOES use the Internet to download packages from repositories so an Internet connection is required. (or if you are crafty download the .deb package files needed)

    • The NIC was not plugged in until after step 6. Then once everything was setup and working I disconnected from the Internet. For my purposes it doesn't need to be online.

    • Some/most things may not work. As every system is different and many variables. Maybe there is some useful information for other scenarios.

    • At the very bottom of this document are some Tips and Tricks. If a step doesn't make sense or you run into an issue check there.


    1.) Downloaded/burned/installed with only the first two CDs (all 8 are not required) from https://cdimage.debian.org/cdimage/archiv….0/i386/iso-cd/

    • debian-7.11.0-i386-CD-1.iso

    • debian-7.11.0-i386-CD-2.iso

    Note: You could also potentially just get the first DVD debian-7.11.0-i386-DVD-1.iso but I don't know how/if that would impact the steps below. ¯\_(ツ)_/¯

    2.) Burn a "files" CD containing anything you might need/want. I only reference TWO files that were burned to the root of a CD. Or get them on the system somehow. USB drive, download it directly, etc.

    • linuxq3apoint-1.32b-3.x86.run

    • NVIDIA-Linux-x86-96.43.23-pkg1.run

    3.) Boot to the first Debian instllation CD. Pretty straight forward installation. I won't guide you on this but I have faith that you can do it! Use default paths for things, mostly use defaults/recommendeds or the steps below won't match.

    4.) When prompted to login for the first time there is an option in the lower left set to "System Default". I had to change this to "GNOME Classic" to avoid graphical issues/missing text in with the System Default/GNOME desktop environment. You may not have this issue but I sure did!

    5.) First thing I checked was my desktop audio which to my surpise worked without doing anything. I still configured a few things in the settings that made sense to me and my Sound Blaster Live! You may be able to skip this step based on your soundcard.

    • Applications > System Tools > Preferences > System Settings > Sound

    • Output tab: changed "Connector" from "Analog Output / Amplifier" to "Analog Output / No Amplifier"

    • Input tab: turned off the input. Not using a microphone for anything.

    • Hardware tab: set Profile to "Analog Stereo Output"

    Note: Many of these steps below have commands that need to be typed into the Terminal. Launch from Applications > Accessories > Terminal. Use the su command to switch to root.

    6.) Now update sources to pull from packages from archive respositories on the Internet.

    • This can be done with the Applications > System Tools > Administration > Synaptic Package Manager if you prefer a GUI.

    --OR you can edit the sources file directly from a root terminal session by typing:

    vi /etc/apt/sources.list

    • Comment out all previous entries that start with deb by putting # at the beginning of the line.

    • Add these lines:

    deb http://archive.debian.org/debian/ wheezy main non-free contrib

    deb-src http://archive.debian.org/debian/ wheezy main non-free contrib

    deb http://archive.debian.org/debian-security/ wheezy/updates main non-free contrib

    deb-src http://archive.debian.org/debian-security/ wheezy/updates main non-free contrib

    • If all looks good now press the ESC key (puts you into command mode) and type the following command to write the file and quit.

    :wq

    Up until this point we made quite a few change so let's take an opportunity to shudown the computer, and plug in the NIC. Start up the computer again and open up a Terminal as root.

    7.) Since we are now connected to the Internet, lets download and install some dependencies that we need for all this magic to work.

    • Update the packages database with:

    apt-get update

    • Now install the dependencies needed for the nVIDIA driver install. Also installing sudo as it was not installed with this CD installation method.

    apt-get install binutils dkms build-essential linux-headers-$(uname -r) sudo

    8.) Now install Quake III Arena! Hunter and Crash are waiting for you.

    • First make the directory structure for game folders/files. (cd to change directory, mkdir to make directory, and cp to copy)

    cd /usr/local/games

    mkdir quake3

    cd quake3

    mkdir baseq3

    cd baseq3

    • Next copy a file from the Q3A CD to our current directory. Your CD path will likely be different but you can try this first.

    cp /media/cdrom0/baseq3/pak0.pk3 ./

    • Now copy the Quake III Arena Point Release 1.32b patch file from the "files" CD we burned earlier.

    cp /media/cdrom0/linuxq3apoint-1.32b-3.x86.run ./

    • Now install the Q3A patch with the following command. Default paths should be fine, don't need to install all the extra stuff. (Server stuff, PunkBuster, etc)

    ./linuxq3apoint-1.32b-3.x86.run

    Note: A directory called .q3a is created in your home directory that stores configuration files, cd key, etc. If you choose to install maps/models/mods/etc it will go in this directory:

    /home/username/.q3a/baseq3

    9.) Next install the nVIDIA driver. Good luck.

    • Since the "files" CD is still in the CD-ROM drive we can just copy the driver file over. We also have to set the execute permission after the file is copied.

    cp /media/cdrom0/NVIDIA-Linux-x86-96.43.23-pkg1.run ./

    chmod +x NVIDIA-Linux-x86-96.43.23-pkg1.run

    10.) To install the nVIDIA drivers we need to be in terminal mode (tty1).

    • Press CTRL+ALT+F1 and login as root. Then we have to stop the GNOME Display Manager.

    service gdm3 stop

    • Next execute the nVIDIA driver we copied earlier.

    /usr/local/games/quake3/baseq3/NVIDIA-Linux-x86-96.43.23-pkg1.run

    • Accept the EULA

    • A.) If this is your first time in this section (A) of step #10 then follow this, otherwise go to the next bullet point.

    You may get an error message "The Nouveau kernel driver is currently in use by your system.", this is expected so press Enter.

    Next you may see a message "For some distributions, Nouveau can be disabled...", select Yes and press Enter.

    Next you may see a message "The modprobe configuration file to disable Nouveau...", this is expected so press Enter.

    Next you may see an error message "Installation has failed...", this is expected so press Enter.

    At this point we will be returned to the terminal so reboot with the reboot command.

    Login like normal and start this section step #10 over again from the beginning, hopefully skipping this step you should be in the next section fool!

    • B.) If this is your second time going through step #10 carry on here assuming the above worked:

    Hopefully you see a message "The CC version check failed...", this is expected. select No and press Enter.

    You should see a message "Would you like to run the nvidia-xconfig utility...", select Yes and press Enter.

    You should see a message "Your X configuration file has been successfully updated...", this is expected so press Enter.

    Now you can just type the reboot command to, you guessed it, reboot.

    • Cunts.) If anything unexpected happned or isn't working I'm sorry but you are on your own. These were my exact steps for success.

    If you are still seeing messages about Nouveau, see "Disabling Nouvea" at the bottom of this guide in the Tips/Tricks section.

    If you have made it this far in all these steps I applaud you. (if you are future me, I'd just like to say you're welcome :p) I'll likely refer to this on a rainy day to spin up a Linux machine for some Quake III Arena fragging action.

    11.) For my sound to work properly in both the desktop AND Quake III Arena I had to auto-load the snd_pcm_oss module/kernel driver at boot. Skipping this step resulted in desktop audio working, but no game audio.

    • Edit the module file with:

    vi /etc/modules

    • Add the following on a new line:

    snd_pcm_oss

    • If all looks good press the ESC key (puts you into command mode) and type the following command to write the file and quit.

    :wq

    12.) Now add your non-root user account to the sudoers file so that user account can execute "super user" commands.

    • This step isn't technically required, but it makes things easier when using your normal user account and want to "sudo" aka super user do commands. We installed sudo in step 7.

    • Open a terminal and enter "su", the enter root password. Then type:

    vi /etc/sudoers

    • In the "# User privilege specification" section add your username below root. It should look like below (note: there is a TAB after the username):

    root ALL=(ALL:ALL) ALL

    irishfury ALL=(ALL:ALL) ALL

    • If all looks good now press the ESC key (puts you into command mode) and type the following command to write the file and quit. The file is read only so ! is used to override.

    :wq!


    That's it! Even if this didn't work pat yourself on the back. If it worked heck yes, or maybe you just needed one of these steps and it helped. Regardless I was determined to figure this out and it's working so I'm happy. Up next, Unreal stuff. (Unreal Gold/Unreal Tournament)


    - Tips/Tricks -

    • Terminal Commands:

    The "su" command is for switch user and allows you change which account commands run under.

    • Just su will switch to root, you can also specify which account.

    su irishfury

    The "ls" command lists the content of the currenty directory.

    The "ls -l" command prints the permission. A file name can be specified after it to only show that one file.

    The "pwd" command prints current working directory.

    The "startx" command starts the GUI from the tty1 command line session.

    The "sudo reboot" command will restart the computer.

    The "sudo shutdown -h now" command will shut down the computer.


    • If there are issues executing a file or if there are permission errors with a command, you can try making the file exectuable with:

    chmod +x FILENAME

    • If that doesn't work grant all permissions with:

    chmod 777 FILENAME


    • To make Terminal load on login go to:

    Applications > System Tools > Preferences > Startup Applications

    Add name "Terminal" with command "gnome-terminal" without quotes


    • VI (Visual Editor) Basic Commands. Look up more commands on the Internet if interested.

    ESC - Terminate insert mode and puts you into command mode to execute the commands below.

    i - Insert at cursor (goes into insert mode)

    a - Write after cursor (goes into insert mode)

    x - Delete character at the cursor

    dd - Delete a entire line

    A - Write at the end of line (goes into insert mode)

    o - Open a new line (goes into insert mode)

    R - Overwrite characters from cursor onward

    u - Undo last change

    U - Undo all changes to the entire line

    :w to write the file

    :q to quit

    If the file is read only you can use ! at the end to override.

    Examples (first have to press the ESC key to enter command mode):

    :q! to quit without saving changes or if no changes were made.

    :wq! to write the file, quit, and override any warning prompts.


    • Create a Quake III Arena desktop shortcut:

    Applications > System Tools > Preferences > Advanced Settings > Theme

    Desktop menu option > turn on "Have file manager handle the desktop".

    Theme menu option > Change the Window theme to AgingGorilla. This step wasn't needed but it's a good step to take.

    Run the following in a non-root account terminal session to create a new text file:

    vi /home/username/Desktop/quake3.desktop

    Put the following text in:

    [Desktop Entry]

    Version=6.9

    Type=Application

    Terminal=false

    Exec=/usr/local/bin/quake3

    Name=Quake III Arena

    Comment=BORN TO FRAG

    Icon=/usr/local/games/quake3/quake3.xpm

    Now right click on the quake3.desktop file on the Desktop and select Properties. On the Permissions tab check Execute: Allow executing file as program.

    Assuming all steps in the guide were followed you should now have a Quake III Arena shortcut on your desktop with a working icon. If not just launch the game frome the terminal with the quake3 command.


    • Disabling Nouveau

    This is a fallback method that can be tried to disable Nouveau if the nVIDIA driver couldn't. These steps might not work but including them just incase it helps anyone.

    Open the blacklist configuration file to block and disable nouveau kernel driver:

    sudo vi /etc/modprobe.d/blacklist.conf

    look up instructions on how to use VI :D and create the blacklist.conf file. Add this content to the file:

    blacklist nouveau

    blacklist lbm-nouveau

    options nouveau modeset=0

    alias nouveau off

    alias lbm-nouveau off

    Disable the Kernel nouveau by typing the following command:

    echo options nouveau modeset=0 | sudo tee -a /etc/modprobe.d/nouveau-kms.conf

    Finally update and reboot with these two commands:

    sudo update-initramfs -u

    reboot


    Actual screenshot from the rig! Linux sure is a different beast.

  • Averages FPS running the "/timedemo 1" and then "/demo four" commands between several equal runs:

    800x600 : 129.2 FPS

    1280x1024 : 107.5 FPS

    1600x1200 : 97.4 FPS

    2048x1536 : 76.7 FPS

    Max Quake III Arena Settings (albeit limited by resolution):

    Video Mode: 1280x1024

    Color Depth: 32 Bit

    Lighting: Lightmap

    Geometric Detail: High

    Texture detail slider maxed out.

    Texture Quality: 32 bit

    Texture Filter: Trilinear


    Also just rocked Xaero:

    3 Mal editiert, zuletzt von IrishFury (13. August 2023 um 07:05)